Light & Shadow
Brightening Dark Areas
- Dark areas in photos are shadows
- Sometimes shadows are too dark to see details
- Like backlit portraits where faces are dark
- We can brighten these dark areas a bit
- Find "Shadows" slider, drag right (+20 to +60)
- After adjustment, dark areas brighten, revealing more details
- Don't adjust too much or photos will look fake
- Backlit photos especially need this adjustment
- Backlit photos: Face or subject too dark
- Indoor photos: Corners or dark areas unclear
- Landscape photos: Foreground too dark, needs brightening
- Remember: Goal is to see details, not make everything bright
- Adjust slowly, increase bit by bit
- If photo looks flat with no depth, you've overdone it
- Keep some dark areas for photo contrast
- If lots of noise appears after adjustment, reduce it
Recovering Bright Areas
-
What are overexposed areas?
-
Simple highlight adjustments
-
When to adjust highlights?
-
Things to watch out for
- Overly bright areas in photos, completely white
- Like sky too bright to see clouds
- Or windows too bright, appearing white
- These areas lose detail and depth
- Find "Highlights" slider, drag left (-20 to -80)
- After adjustment, bright areas darken, revealing details
- Sky shows clouds, windows show outside view
- This adjustment is especially useful for landscape photos
- Sky too bright: Can't see clouds and layers
- Indoor shooting: Windows too bright, appearing white
- Snow scenes: Snow too bright without texture
- Seascapes: Water surface reflection too strong
- Don't adjust too much or photo will appear dark
- Maintain photo brightness, just recover details
- RAW format photos will have better results
- May need to slightly increase overall brightness after adjustment
Making Light Look Better
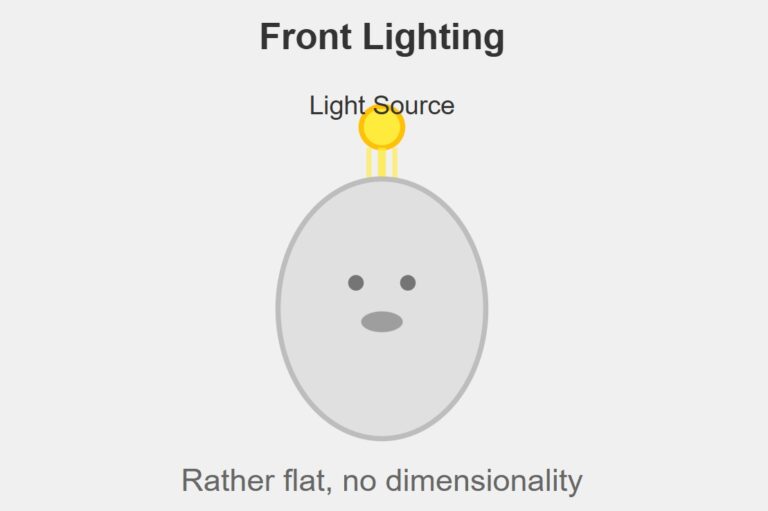
Front lighting
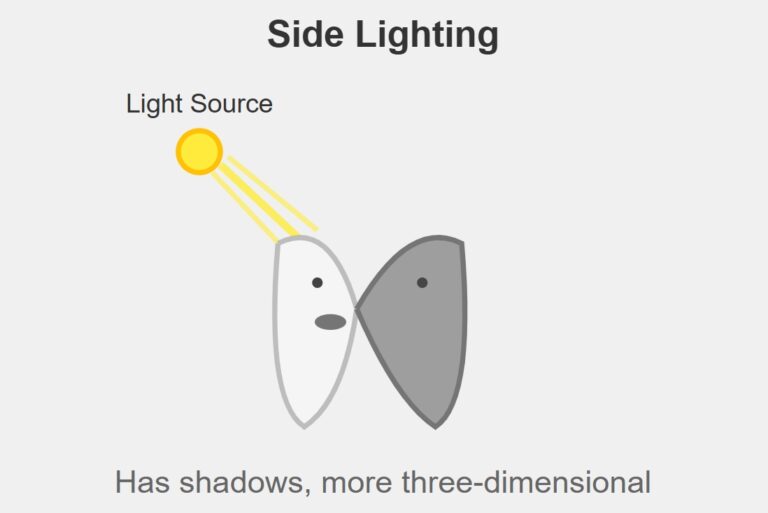
Side lighting
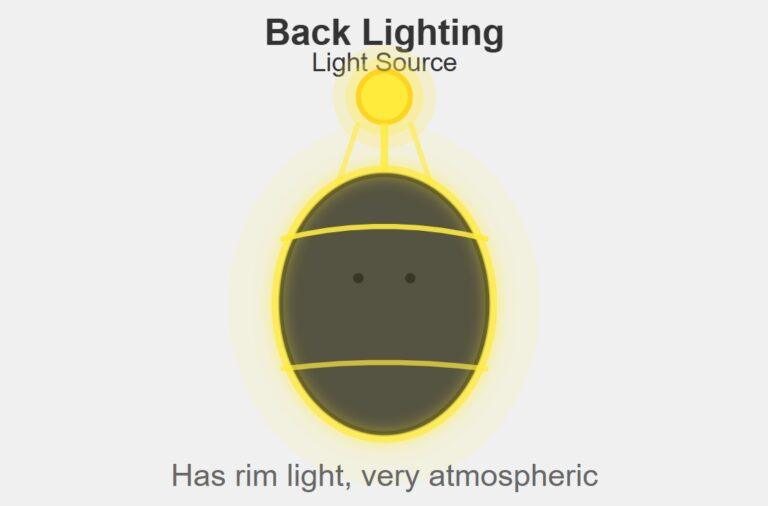
Back lighting
- Use "Radial Filter" to add light to specific areas
- Like adding a brighter circular area to faces
- Use "Gradient Filter" to simulate light from one side
- This makes flat photos more dimensional
- Spotlight effect: Make subject more prominent
- Window light effect: Simulate light from windows
- Sunset light effect: Add warm side lighting to photos
- Rim light effect: Make subject edges glow
- Portrait photos: Add soft light to faces
- Landscape photos: Emphasize light directionality
- Indoor photos: Simulate natural light feeling
- Remember: Light should look natural, not fake
Dimensional Enhancement
- Create layers through light-dark contrast
- Use color depth to create sense of distance
- Adjust clarity to emphasize subjects
- Blur background to enhance focus
- Foreground: Increase contrast and clarity
- Midground: Maintain natural balance
- Background: Moderately reduce contrast
- Create visual leading lines
- Radial blur to create focus
- Gradient adjustments to simulate depth of field
- Local sharpening to highlight details
- Color separation to enhance layers